Translate

Tuesday, March 25, 2014

Free Online Kasuti Embroidery Tutorial - An Analysis of the Patterns in Session 3

As, mentioned in the previous post, there are similarities in the working of the 4 designs in session 3.  For ease of comparison, let's place the 4 together.

Look at the lines I've circled. They connect 1 block of pattern to the next. You can repeat the pattern any number of times using these connecting lines. These lines dictate why and where you should take a side-trip.
Now, let's examine each sample in turn.

Sample 1: The purple portion, below the connecting line, in the first section of the pattern, leads to a dead end and so, it can only be a side-trip. All the purple lines are dead ends. This decides the path the main journey should take.

Sample 2: Here, when we first look at the pattern with an inexperienced eye, the obvious path for the main journey would appear to be the entire upper portion and then the entire lower portion. 

What will happen when we do that? 

We'll end up working the connecting lines a second time (overlapping) on the return journey.

So, the only way to work this, is to treat the lower half of each betel nut flower as a side-trip and use the connecting line to reach the next flower.

Sample 3:  Here's an alternate path. B=D means, B is the same point as D.  You can work the swastiks the same as in sample 3.3; or work them separately, if you want to use a different colour. 

Sample 4: Here's an alternate method. You can complete the lower part of each gopur (side-trip) and use the connecting line to get to the next. Complete the portion above the connecting lines on the return journey.

Locate connecting lines, understand its role and kasuti is a breeze.

Hope this clears any doubts you may have regarding the tutorials we've done so far. Let me know if you have any problems.

Monday, March 24, 2014

Free Online Kasuti Embroidery Tutorial Sample 3.4 - Conch Shell Border

This design is worked on a similar principle as all the designs in session 3. Locate a clear path for the onward journey. Work all the side-trips on your return journey.
Here are the steps to tackling this pattern. Do note that this is not the only way. It's just the way I'd do it.

Step 1: Start at 1 and follow graph until you reach 2 from the other side. Your onward journey is complete.

Step 2: Return journey starts at 'a'. 'e2' to the part indicated in the image below is a major side-trip and so is the section A-B. 

Notice that all the samples in session 3 have huge sections of the pattern treated as side-trips.

Do leave your comments about this session.

Saturday, March 22, 2014

Free Online Kasuti Embroidery Tutorial Sample 3.3 - Swastik Border

Working this border is not as complicated as it might seem. Just identify the main trip and the side- trips.  Remember, no overlaps.

Step 1: The figure below shows the path I've chosen as my main trip. Yours need not be the same. But this, is the easiest path, and also the least confusing. It ends at 41.

Step 2: Here's where we are going to get confused. So I've changed the colour of the main trip to blue and I've used orange and brown to indicate side trips. With this, we complete the lower half of the design.
Note: If you want to use a different colour for the swastiks, at 44, go on to 51 ...54 and then 61...64, 65.

Step 3: Now there's not going to be any more confusion about main and side-trips. So, for ease of reference, I've changed the colour of all completed portions and the main journey to blue in the image below. So, only the incomplete side-trips will be in brown and orange.


Hope you find this tutorial useful. If you happen to come across any errors, please let me know.

Monday, March 03, 2014

Free Online Kasuti Embroidery Tutorial Sample 3.2 - Betel-nut String of Flowers

Working a single betelnut flower was part of assignment 2; and it's fairly simple once you know where to start. But working a string of flowers is a wee bit complicated.

Observe the image below. Pay special to the connecting lines between the flowers.  I've deliberately alternated one and two lines between flowers, because they demand complete concentration.


To determine the route to follow for the onward journey, just trace the pattern with a pencil. There is just one rule you have to follow.

No overlaps.

Step 1: This is the route I have chosen.  I've stopped and 50. This is not necessarily the only way. You can can go all the way up to 2.

 Step 2: 50 in step 1 is 51 here. You start your return trip here. Take care of all the side trips. I've used numbers to illustrate how to work the last flower.  Simply repeat the procedure until you reach 2.


No matter which route you choose for the forward journey, remember to take care of all the side trips in the return journey.

Hope this helps.  Let me know how you've fared with this tutorial.

Wednesday, January 22, 2014

Free Online Kasuti Embroidery Tutorial Sample 3.1 - Conch Shell Border

Here's Sample 3.1 - The first sample in session 3.

This pattern is quite easy- once the basic nuances of kasuti are mastered.

I've used red lines to indicate the main journey and purple to indicate all the side trips.

If you have any trouble working this design, let me know.

Sunday, January 12, 2014

3 in 1 Design For Kasuti Embroidery

Here's a 3 in 1 design for Kasuti embroidery. 

Skill Level: Sessions 1 and 2 should equip you for this.

I drew these 3 one inside the other to save space on my graph sheet. On completion, I liked the way the smaller motifs completely fill out the space in the center without looking overcrowded.
I used the green lines to help me draw this pattern without getting confused. Often when embroidering on fabric, I use running stitch to draw these lines This tells me exactly where I am in the design and how much further I have to go. There is much less confusion when you break it down a pattern into smaller units.

Let's call the green lines radials. You can use the radial as a pivot if you want to experiment with rotating the pattern. 

Ideas for Variations
1. Rotate the entire design 45 degrees.
2. Rotate only the motif in blue 45 degrees.
3. Position the small red motif in the center around the pattern - one at the tip of each spoke of the radial.

If you have ideas any different from these, I'd love to hear them.

Wednesday, January 08, 2014

Free Online Kasuti Embroidery Tutorial - Assignment 2

Here's assignment 2.  If you are comfortable with session 2.2, you should be able to do this.


Hints:
1.The first design is very simple.  Treat the straight line as the main journey and the design extensions as side trips and side trips within side trips.

2. Tiger's Claw Motif - start at the center and treat each arm as a side trip and get back to the center to start on the next one. If you plan to use the motif as a running design, then you'll have to start at the end of one of the arms.
3. Betelnut Flower- Start at the center.  Each colour represents a side trip that will bring you back to the center. Using this motif in a running design is slightly more complicated.

Using the tiger's claw and the betelnut flower in running designs will be the subject of my next post.

Share if you like this and please feel free to point out mistakes I may have made. Do leave your comments on your experiences in working these motifs.

Friday, December 27, 2013

Kasuti Embroidery on Net - Step by Step Tutorial

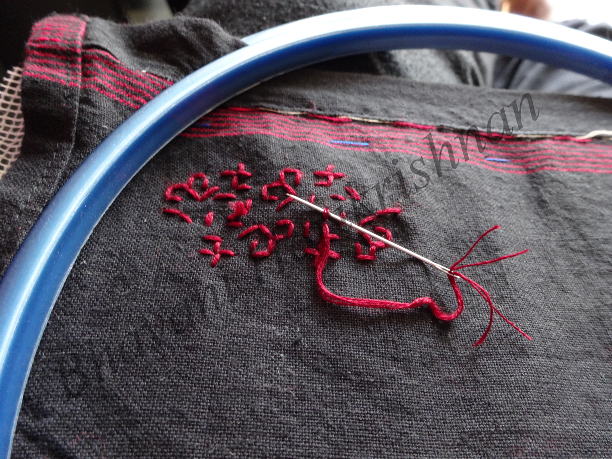
I've had this fabric from an old salwar for close to 10 years. I finally found a project for it. I thought, I'll use this for my 'Kasuti Using Net' sampler and turn it into a wallet.
I've attached the net to fabric. The steps are explained below.
Positioning the Motifs

I plan to work 3 stand alone motifs on this strip. So, I folded the fabric along with the net in half both lengthwise and width wise and marked the center. Alternately, you can either measure it out or if you have the time and patience count out the number of squares in the net. I should have worked the center motif first. But the thought somehow did not occur to me. 
To mark the position of my first motif, I folded the part of the fabric to the left of the center such that the seam line aligned with the center. The starting point 'S' is 3 stitches lengths away from the center. I've marked the center with an X in the graph above. The 3 black horizontal lines from X to S indicate 3 stitch spaces.

Net Vs Graph
The adjacent image should clarify any doubts you may have about the relationship between the vertical, horizontal and diagonal lines on the graph versus the net.
Making The Knot
Kasuti is supposedly a style that is worked without knots. Remember the embroidery is reversible and for the embroidery to be truly reversible, the work should look very neat on both sides. But I prefer to use knots. I wouldn't want the embroidery to unravel. So, here's how I've worked my knot. It neatly secures the beginning yarn. Here are the steps
Step 1: Pick up about 2 threads of fabric (in the direction B to A) with your needle and pull it through leaving just about 1/2cm of yarn (tail yarn). Hold the tail yarn down firmly with your left thumb. Take the needle around to B again as indicated by the pink arrow and pull the yarn through the same space.  The other steps are clear enough. Hold the 1/2 cm tail down firmly or it will slip through and you'll have to repeat the process. You can click on the image for a slightly enlarged version.

Kasuti Embroidery on Net Grid
Now that we got the basics out of the way, use the images below to guide you through working the motif on net.

I've completed all the side trips in the first half of the onward journey and reached the center of the motif.
I've completed the onward journey including all the side-trips and I've run out of yarn. The image below shows how to weave the yarn into the pattern on the reverse.
Here's the completed motif
Use the method above for working running motifs (motifs are arranged to form a continuous running pattern) Complete the onward along with the side trips till the end and then work the return trip.

For stand alone motifs, it is easier to start at the center and treat each arm of the pattern as separate journeys complete with side trips. That's how I worked the motif the 2nd time.  Check out the image on the left.

I've started at the center, completed the left side of the pattern and returned to the center.
In the picture on the left, the right onward journey.  When I complete the return journey, I'll get back to the center where I started.

Removing Net

 If you closely observe the warp and weft yarn of the net, you'll see that the warp has 2 strands of twisted yarn and while the weft a single strand.  It's therefore easier to remove the weft yarn. So that's what we'll do.

Removing the net is easy enough where there's no pattern to hinder it.

When the pattern makes it tricky, insert a needle under it and gently pry it loose as shown in the image on the below.
Once all the weft thread covered by the motif is removed, a gentle tug is all it takes to completely remove the net.
 Hope this helps. If you like this post share it and do leave your comments.

Tuesday, December 24, 2013

Kasuti Sampler

I've prepared a sampler with a few patterns ranging from basic to challenging. Click on the images to enlarge.
Patterns 1 and 2 are worked in Muragi; The Holbein stitch is worked as zig-zag lines.
The third and fourth require a bit more attention and concentration. They are worked in Ganti style; uses horizonatal, vertical and diagonal lines.

The peacock motif below employs the Ganti style style as well; and is sightly more complicated mostly because of the number of side trips involved. On closer observation, you'll see that the 2nd peocock image is of the reverse side of fabric and not a flipped image.

 Negi Kasuti - uses the same technique as weaving.

The motif above is called the Padma or the lotus.  Next to the Gopur or the temple dome, this motif is the most popular.  I have not removed the net (Update: this net is no longer available. Starched medical gauze can be used as an alternative) I used as grid for counting. You can try this design once you master the basics. It's complicated, but not that complicated. Remember nothing is really as difficult as it might as first seem.  All we need to do is analyse it, decide on a course of action and work on it.

The image below showcases of the reverse side of fabric. You can see why Kasuti is called reversible. Except for the finished ends woven in, the pattern looks exactly the same on both sides of the fabric.
This now is a tough one.  It is done in a style called Murugi kasuti (meaning twisted). Motifs typical to this style have a lot of zigzags.  It is easy to get lost trying to work this motif. But if you decide on a path and stay on course, you'll make it in.

Saturday, December 21, 2013

Free Online Kasuti Embroidery Tutorial Sample 2.2 - Basic Side-Trips

Here's the motif for this lesson.

For this session, I thought I'll take you through the steps involved in using a net for the kasuti embroidery. Here's my worked sample on net.

Here's what it looks like after removing the net. I plan to make this into a purse. Click on the image enlarge.


Before we get into working on a net, let's analyse the motif as usual. I'll explain how to use the net in my next post.  Here are the steps for the forward journey.


Start at 1 and complete all side-trips as you go along. As in life, in embroidery too, it's better to tackle tricky problems head on and be done with it.

The return journey as you can see from the image above is very simple only because we finished all the side trips in the onward journey itself.

Notes: 
First work this as a stand alone motif 2-3 times.  Once you get the hang of it, you may want to try this as a running border. To make the border, I placed 2 motifs adjacent to each other and added a horizontal connecting line.

As always, if you have any problems with working this pattern, let me know and I'll help you out.

I'll walk you through the steps involved in working with a net in my next post.

Thursday, December 19, 2013

The Similarity of Russian Embroidery to Kasuti

I've been was talking about embroidery styles around the world that use the same principles as Kasuti. I discovered Free Historic Old Pattern Books.The website is a treasure house for old patterns lovers.

I've linked to the page that has a book full of patterns similar to Kasuti and Blackwork.  It also has a bit of Assissi Embroidery thrown in for good measure.

Take a look at the images below. Looks like a fusion of styles. Yet, these patterns are unique to Russian Embroidery.

 The picture above could easily be mistaken for a kausti design. But the quill like projections is not a part of a typical kasuti pattern.

The one above looks like a typical Assissi motif. But it's not. The negative space in this motif is filled with the four-sided stitch as opposed to cross-stitch used in Assissi Embroidery.


The one above has a design structure similar to Kasuti Embroidery. But Kasuti embroidery only ever has zig- zag or diagonal or long horizontal lines.  Not curves.

The one above looks like a combination of Kasuti and Kutchwork. But take a closer look at what looks like a typical Kutchwork border.  It's not what it appears to be. Individual motifs are connected by zig-zag lines.

The picture above has the flavour of Spanish Blackwork. Yet it isn't.

Despite these distinctions, the common thread that connects all these styles is that they all employ the Holbein stitch and they are all reversible.